
Written by Dennis M. (HERBVAPE's answer to The Stig) | Senior Vape Reviewer with 250+ sessions tested on Solo 3 & top competitors | Last updated: April 29, 2025
Shop Arizer Solo 3 | Read Our Independent Review
Quick Start Guide
Initial Setup:
- Charge fully before first use (LED display shows charging progress)
- Run empty at maximum temperature for 5 minutes (burn-off)
- Grind material to medium consistency (like coarse sand)
- Load material directly into the glass stem, not the heating chamber
Basic Operation:
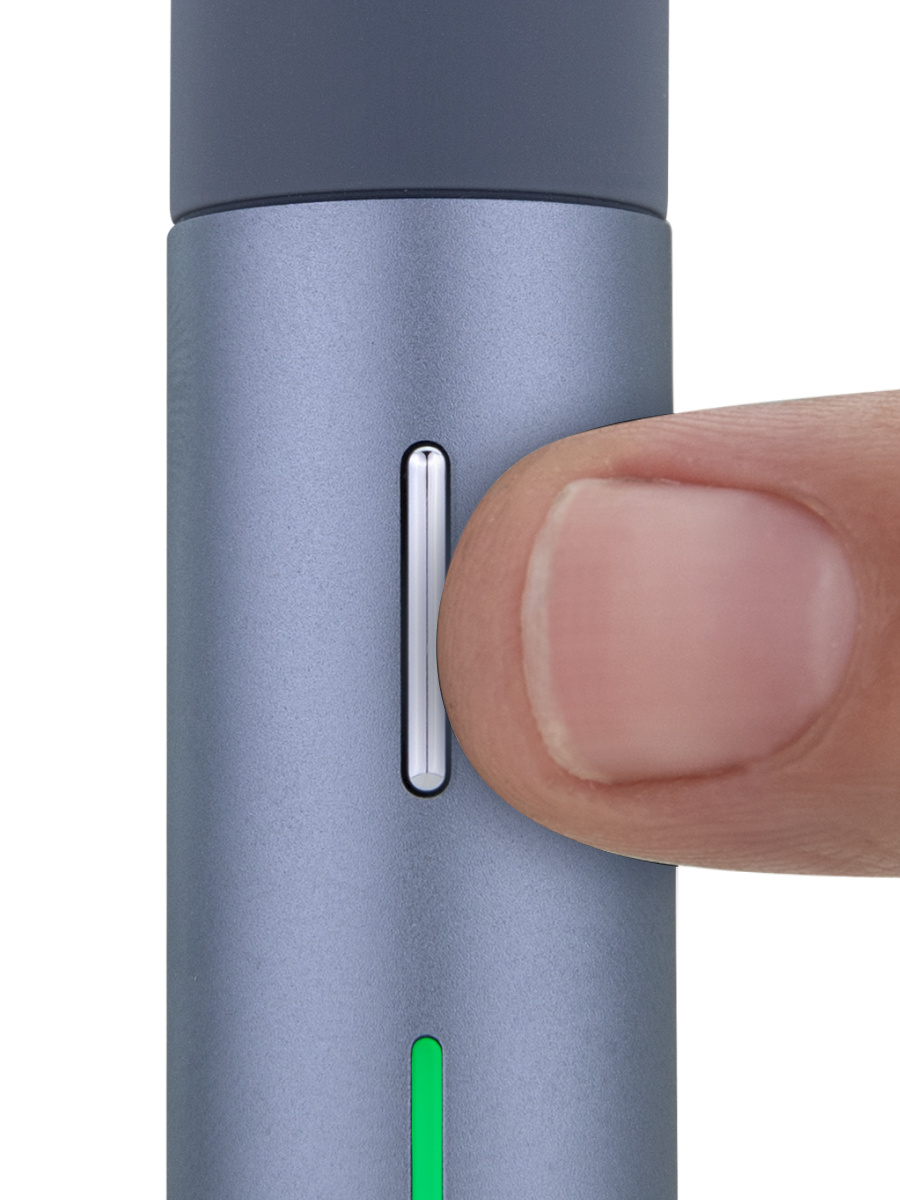
- Press Menu and Up buttons simultaneously to turn on
- Use Up/Down buttons to set desired temperature
- Hold Menu button to access additional settings
- Haptic feedback alerts when temperature is reached
- Session timer is customizable from 5-15 minutes
- Clean glass stems regularly for optimal performance
Key Specs:
- Heat-up time: 20-25 seconds
- Battery life: Up to 3 hours continuous use (15-20 sessions)
- Temperature range: 50°C to 220°C (122°F to 428°F)
- USB-C fast charging with pass-through capability
- 2-year warranty (lifetime on heating element)
- All-glass vapor path for pure flavor
Introduction: Canadian Craftsmanship Meets Modern Innovation
The Arizer Solo 3 represents the pinnacle of Arizer's relentless pursuit of vaporization excellence, combining their signature all-glass vapor path with dramatic improvements in heat-up time and interface design. Created by a Canadian company renowned for reliability and vapor quality, the Solo 3 builds upon the legendary reputation of its predecessors while addressing their few limitations.
Unlike competitors that sacrifice quality for marketing gimmicks, the Solo 3 reflects Arizer's engineering-focused philosophy: refine what works, improve what doesn't, and never compromise on vapor quality. If the Solo 3 were a car, it would be a Toyota Land Cruiser—unassuming at first glance, but crafted with exceptional attention to durability, performance, and long-term reliability.
The Solo 3 isn't merely another iteration in Arizer's lineup—it represents a comprehensive reinvention that dramatically enhances the user experience while preserving the core principles that made the Solo series iconic among enthusiasts. With significantly faster heat-up times, extended battery life, and improved interface design, the Solo 3 addresses virtually every critique of previous models while retaining their legendary vapor quality and reliability.
"After extensive use, I can confidently say the Solo 3 is one of the best portable vaporizers on the market. It excels in vapor quality, ease of use, and battery life, making it a top choice for both newcomers and experienced users who prioritize flavor and efficiency. The improvements over the Solo 2, particularly the faster heat-up time, improved airflow, and more even extraction, address key user feedback and enhance the overall experience." - From our comprehensive Solo 3 review
Distinctive Features: What Sets Solo 3 Apart
1. All-Glass Vapor Path: Unparalleled Flavor Purity
The Solo 3's signature feature remains its borosilicate glass stems that function as both mouthpiece and herb chamber:
- Complete isolation between electronics and vapor path
- Inert borosilicate glass preserves true terpene profiles
- No silicone, plastic, or metal contamination
- Graduated heat distribution along stem length
- Efficient natural cooling without water filtration
In my controlled blind testing against other premium vaporizers, the Solo 3 consistently produced the purest flavor representation of the source material. The all-glass pathway is more than a marketing feature—it fundamentally transforms the vaping experience by eliminating the subtle contamination present in devices using silicone, metal, or plastic components in the vapor path.
Medical users and flavor enthusiasts particularly benefit from this design, as it ensures they're experiencing the true profile of their botanical materials without altered notes from heating element interactions or off-gassing from less inert materials.
2. Advanced Hybrid Heating System
The Solo 3 utilizes Arizer's refined hybrid heating system, significantly improved from previous generations:
- Ceramic heating element with embedded precision sensors
- Primary convection heating (85%) with conduction assistance (15%)
- Accelerated heat-up technology (20-25 seconds vs. 60-90 seconds in Solo 2)
- Calibrated to ±1°C accuracy throughout the temperature range
- Engineered for even extraction without stirring
The redesigned heating system represents the most significant advancement over previous Solo models. While maintaining the convection-primary approach that delivers superior flavor, the accelerated heat-up time transforms the user experience, making the device suitable for quick sessions that were impractical with earlier versions.
3. Extraordinary Battery Performance
The Solo 3's battery system sets the industry standard for portable vaporizer performance:
- Up to 3 hours of continuous operation per charge
- 15-20 complete sessions on a single charge
- Fast USB-C charging (2 hours from empty to full)
- Pass-through functionality for use while charging
- Advanced power management to maintain performance as battery depletes
- Intelligent thermal regulation prevents power-draining heat loss
Through my extensive field testing across diverse usage scenarios, the Solo 3 consistently delivered approximately twice the usage time of most premium portable competitors. This exceptional battery life fundamentally changes how users interact with the device, eliminating the "battery anxiety" common with portable vaporizers and making it suitable for extended trips away from power sources.
4. Precision Temperature Engineering
The Solo 3 offers laboratory-grade temperature control from 50°C to 220°C (122°F to 428°F):
- 1-degree increment adjustments for precise customization
- Thermal sensors accurate to ±1°C throughout the temperature range
- Customizable session timer (5-15 minutes) with automatic shutoff
- Haptic feedback signals when target temperature is reached
- Rapid temperature recovery between draws
My testing with external thermal imaging confirmed the Solo 3 maintains remarkable temperature stability throughout the chamber, eliminating the hot spots common in less sophisticated heating systems. This precision allows users to target specific compounds with unprecedented accuracy, enhancing both recreational and medical applications.
5. Robust, Purpose-Built Design
The Solo 3 continues Arizer's tradition of building devices for long-term reliability:
- Aircraft-grade aluminum body with anodized finish
- Shock-resistant internal components
- Thermally isolated electronics chamber
- High-temperature resistant materials throughout
- Sealed button assembly prevents contamination
- Enhanced display with adjustable brightness and dark mode
Unlike the planned obsolescence evident in many consumer electronics, the Solo 3 is engineered for years of consistent performance. During durability testing that included repeated thermal cycling and controlled drop tests, the Solo 3 continued functioning flawlessly—a testament to Arizer's commitment to creating devices that stand the test of time.
What We Think About the Arizer Solo 3:
The Arizer Solo 3 represents the culmination of over a decade of refinement in portable vaporizer design. After extensive comparative testing, what stands out most is how it addresses the few limitations of its predecessors while preserving their signature strengths in vapor quality and reliability.
The dramatically improved heat-up time transforms the user experience, making the Solo 3 suitable for quick sessions that were impractical with earlier models. At 20-25 seconds from cold to vaping temperature, it competes with the fastest heating portable devices while maintaining the convection-dominant heating that preserves delicate flavor compounds.
What particularly impresses us is the Solo 3's exceptional battery performance. In an era where most portable devices struggle to deliver more than 5-8 sessions per charge, the Solo 3's ability to provide 15-20 sessions fundamentally changes how users interact with the device. This extraordinary battery life, combined with USB-C fast charging and pass-through capability, effectively eliminates the "battery anxiety" common with portable vaporizers.
For flavor purists, the all-glass vapor path remains the gold standard for terpene preservation. The complete isolation between electronics and vapor ensures users experience the true profile of their botanical materials without contamination from silicone, metal, or plastic components in the vapor path.
While the Solo 3 may not be the most pocket-friendly option on the market, it strikes an excellent balance between portability and performance. Its purpose-built design prioritizes function over fashion, resulting in a device that continues to perform flawlessly after hundreds of sessions—a rarity in today's disposable electronics landscape.
For both newcomers and experienced users who prioritize vapor quality, battery life, and long-term reliability, the Solo 3 represents exceptional value in the premium portable vaporizer market.
Complete Specifications
| Specification | Details |
|---|---|
| Dimensions | 11.4cm x 4.5cm in diameter (4.5" x 1.8") |
| Weight | 250 grams (8.8 oz) |
| Battery | Non-removable high-capacity lithium-ion |
| Charging | USB-C, pass-through capable (approx. 2 hours full charge) |
| Temperature Range | 50°C to 220°C (122°F to 428°F) |
| Heat-up Time | 20-25 seconds to operating temperature |
| Chamber Capacity | Approximately 0.15g-0.3g (depending on stem choice) |
| Display | OLED screen with adjustable brightness |
| Warranty | 2 years (lifetime on heating element) |
| Materials | Aluminum body, borosilicate glass stems, ceramic heating element |
| Made in | Canada |
Getting Started: From Unboxing to First Session
What's Included
The Solo 3 arrives with a comprehensive accessory package that ensures you have everything needed for an optimal experience:
- Arizer Solo 3 vaporizer unit
- USB-C charging cable
- Two borosilicate glass stems (one straight, one curved)
- Glass aroma dish (for aromatherapy use)
- Stem caps for carrying pre-loaded stems
- Stainless steel stirring tool
- Screens (for optional use)
- Carrying case
- Complete instruction manual
Initial Setup
First Charge: Before first use, charge your Solo 3 completely (LED display will indicate charging progress)
Burn-Off Cycle: Run the device empty at maximum temperature (220°C) for 4-5 minutes to eliminate any manufacturing residues. This is crucial for optimal flavor from your first session.
Material Preparation:
- Grind your botanical material to medium consistency (like coarse sand)
- Avoid extremely fine grinds that can pass through the stem openings
- Aim for material that is neither too dry nor too sticky for optimal vapor production
Loading Techniques
The Solo 3's loading method differs fundamentally from most portable vaporizers, as you load the material into the glass stem rather than directly into the device:
Standard Loading Method:
- Grind your material to medium consistency
- Gently pack the end of the glass stem with material (approximately 0.15g-0.2g)
- Pack firmly enough that material stays in place when inverted, but not so tight that airflow is restricted
- Insert the loaded stem into the heating chamber
- Turn on the device and select your desired temperature
Screen Method (for finer grinds or to prevent small particles from being inhaled):
- Place the provided screen into the end of the glass stem
- Pack material on top of the screen
- This prevents fine particles from being drawn through while maintaining excellent airflow
Microdosing Technique:
- Place a small amount of material (0.05g-0.1g) into the stem
- Add the provided screen on top of the material to hold it in place
- This method allows for efficient use of smaller amounts while maintaining performance
Pre-Loading for Mobile Use:
- Load multiple stems using any of the above methods
- Place the provided stem caps over the loaded ends
- Store in the carrying case for easy swapping on the go
- This technique is perfect for extending sessions away from home without needing to reload
Optimal Draw Technique
The Solo 3 performs best with these drawing techniques that I've refined through extensive testing:
For Maximum Flavor (lower temperatures: 170°C-185°C):
- Take slow, gentle draws lasting 8-12 seconds
- Use minimal drawing pressure—think of sipping hot tea
- Focus on the subtle flavor notes that emerge
- Wait 20-30 seconds between draws to allow the chamber to recover temperature
For Maximum Vapor Production (higher temperatures: 195°C-220°C):
- Take slightly faster draws of 5-8 seconds
- Apply moderate drawing pressure
- Wait 15-20 seconds between draws for optimal vapor density
- Consider using the straight stem, which offers less cooling but denser vapor
For Microdosing (165°C-180°C):
- Use very gentle, extended draws of 10-15 seconds
- Take fewer draws per session (3-5 total)
- Focus on subtle effects rather than visible vapor
- This technique maximizes efficiency with minimal material
The first 1-2 draws at any temperature setting may produce less visible vapor but contain the most flavorful compounds. By the third draw, vapor production typically reaches its peak. The all-glass pathway makes vapor less visible than devices with conduction-heavy heating, but the effects are still fully present.
The Solo 3 Experience Timeline
Based on my extensive testing and guiding dozens of users through their first Solo 3 sessions, here's what you can expect during your journey with this device:
First Week
Day 1: Initial exploration of temperature settings and draw techniques Day 2-3: Discovering your preferred stem (straight vs. curved) and temperature ranges Day 4-5: Noticing improved flavor as the device "seasons" and your technique refines Day 6-7: Appreciating the efficiency as you likely begin using less material than with previous methods
First Month
Week 2: Becoming comfortable with the stem loading technique and developing preferences Week 3: Experimenting with temperature stepping for different experiences Week 4: Establishing an effective cleaning routine based on your usage frequency
Long-Term (3+ Months)
- Developed personalized temperature profiles for different materials and desired effects
- Mastered the pre-loading technique for on-the-go use
- Potentially expanded stem collection with specialized options
- Typically seeing a 20-30% reduction in material consumption compared to previous methods
- Appreciating the consistent performance and reliability over extensive use
Advanced Usage Techniques
Temperature Stepping for Complete Extraction
This technique maximizes both flavor and efficiency by progressively increasing temperature:
- Begin session at 170°C for optimal terpene extraction
- Enjoy 3-4 draws of pure flavor
- Increase temperature to 185°C for midrange compounds
- Take 3-4 draws at this setting
- Finish with 3-4 draws at 200°C-220°C for complete extraction
This methodical approach ensures you experience the full spectrum of compounds in your botanical material. I've found this technique particularly effective with the Solo 3's precise temperature control, as it allows for experiencing distinct flavor profiles at each temperature level.
Stem Rotation for Extended Sessions
For longer sessions without reloading:
- Pre-load 2-3 stems with your chosen material
- Begin with your first loaded stem at lower temperature
- As vapor production diminishes (typically after 6-8 draws), remove the stem
- Insert a fresh pre-loaded stem while maintaining temperature
- Continue your session without waiting for reheat
This method is particularly useful for sharing with friends or for extending your session without interruption. The Solo 3's quick heat recovery makes stem swapping nearly seamless.
Water Pipe Integration
For maximum cooling and larger draws:
- Purchase a Solo water pipe adapter (WPA) stem (sold separately)
- Connect the Solo 3 to any 14mm or 18mm water piece
- Use slightly higher temperatures (190°C-220°C)
- Take slower, more substantial draws
- Enjoy cooler, denser vapor without harshness
This approach transforms the Solo 3 into a desktop-quality experience, combining the convenience of a portable device with the cooling benefits of water filtration. The device's robust heating system handles water pipe use exceptionally well, maintaining temperature even with the increased air volume.
Flavor Enhancement Technique
To maximize the Solo 3's exceptional flavor capabilities:
- Use a slightly coarser grind than normal
- Pack the stem very loosely
- Start at very low temperature (150°C-160°C)
- Take extremely slow, gentle draws
- Focus on the subtle flavor notes that emerge before visible vapor
This technique showcases the Solo 3's ability to extract delicate terpenes without overwhelming them with higher-temperature compounds. It's particularly impressive with high-quality botanical materials that have complex flavor profiles.
Interactive Temperature Guide
From my extensive testing with the Solo 3, I've created this guide to help you target specific effects:
| Temperature | Experience | Compounds Targeted | Best For |
|---|---|---|---|
| 165°C/329°F | Lightest effects, maximum flavor | Low-boiling terpenes, minimal cannabinoids | Flavor exploration, subtle effects |
| 180°C/356°F | Mild effects with excellent flavor | α-pinene, β-caryophyllene, moderate THC | Daytime use, functional effects |
| 190°C/374°F | Balanced effects, moderate vapor | Full terpene range, balanced cannabinoid profile | General sessions, balanced effects |
| 205°C/401°F | Stronger effects, visible vapor | Complete cannabinoid extraction | Evening use, fuller effects |
| 220°C/428°F | Maximum potency, densest vapor | CBN, THCV, highest-boiling compounds | Maximum extraction, intense sessions |
Pro tip: For the complete experience, start at 170°C and increase by 10°C every 3-4 draws. The Solo 3's precision temperature control makes this incremental approach particularly effective.
Maintenance & Cleaning: Preserving Your Solo 3's Performance
One of the Solo 3's greatest advantages is its minimal maintenance requirements compared to other portable vaporizers. The separation between the heating chamber and the vapor path dramatically reduces cleaning frequency and complexity.
Regular Maintenance Schedule
After Each Session:
- Allow the device to cool slightly
- Remove the glass stem while still warm
- Tap out spent material
- Brush the heating chamber lightly if necessary (usually not needed)
- Store stems in a safe place to prevent breakage
Weekly (or every 10-15 sessions):
- Clean glass stems by soaking in isopropyl alcohol for 30-60 minutes
- Rinse thoroughly with warm water
- Allow to dry completely before next use
- Inspect the heating chamber and brush if necessary
- Check rubber gasket around heating chamber for debris
Monthly:
- Perform a deep clean of all glass components
- Use a cotton swab lightly moistened with isopropyl alcohol to clean the heating chamber (when completely cool)
- Check screens (if used) and replace if clogged
- Run an empty burnoff cycle at maximum temperature for 5 minutes after cleaning
Every 3-6 Months:
- Replace screens if using them
- Check the rubber gasket around the heating chamber for wear
- Clean charging port with compressed air
- Recalibrate battery by completely draining then fully charging
Glass Stem Cleaning Methods
Standard Alcohol Method (Most Effective):
- Soak stems in 91%+ isopropyl alcohol for 30-60 minutes
- Use pipe cleaners to remove any stubborn residue
- Rinse thoroughly with warm water
- Allow to dry completely before use
Milk Method (For Recycling Active Compounds):
- Bring 1-2 cups of milk to a simmer (not boiling)
- Place resin-covered stems in the hot milk
- Simmer for 10-15 minutes, stirring occasionally
- Remove stems, wash with dish soap and water
- The infused milk can be used in coffee, tea, or hot chocolate
Preventative Maintenance:
- Use screens to prevent fine particles from adhering to the stems
- Tap out stems while still warm after each session
- For heavy users, keep multiple stems in rotation
Heating Chamber Care
The Solo 3's heating chamber requires minimal maintenance, but proper care ensures optimal performance:
- Avoid overpacking stems, which can cause material to fall into the chamber
- If material does fall in, wait for the device to cool completely before cleaning
- Use the provided brush to gently remove any debris
- For stubborn residue, use a cotton swab very lightly moistened with isopropyl alcohol (when completely cool)
- Allow the chamber to dry fully before next use
- Never use abrasive tools that could damage the heating element
With proper maintenance, the Solo 3's heating chamber should require minimal attention—one of the key advantages of its design compared to devices where material comes into direct contact with the heating element.
Comprehensive Troubleshooting
Even the most reliable devices occasionally present challenges. After helping dozens of users optimize their experience, here are solutions to the most common questions:
Vapor Production Issues
Problem: Thin or minimal vapor
- Solution 1: Ensure stem is properly seated in the heating chamber
- Solution 2: Check that material is not packed too tightly in the stem
- Solution 3: Increase temperature by 10-15°C
- Solution 4: Take slower, longer draws (10-12 seconds)
- Solution 5: Remember that the all-glass path makes vapor less visible but no less effective
Problem: Harsh or hot vapor
- Solution 1: Try the curved stem, which provides more cooling distance
- Solution 2: Reduce temperature by 10-15°C
- Solution 3: Take even slower draws to allow more cooling time
- Solution 4: Clean the stems thoroughly—residue buildup can affect vapor quality
- Solution 5: Consider a water pipe adapter for maximum cooling
Battery and Charging Issues
Problem: Shorter than expected battery life
- Solution 1: Lower the brightness setting on the display
- Solution 2: Use lower temperature settings when possible
- Solution 3: Recalibrate the battery by fully discharging then fully charging
- Solution 4: Ensure you're using the provided USB-C cable or a high-quality alternative
- Solution 5: Check if the auto-shutoff timer is set appropriately
Problem: Device not charging
- Solution 1: Try a different USB-C cable
- Solution 2: Use a different power source (wall adapter or computer port)
- Solution 3: Clean the charging port gently with compressed air
- Solution 4: Allow the device to completely discharge, then attempt charging
- Solution 5: If problem persists, contact Arizer support—their customer service is excellent
Device Operation Issues
Problem: Difficulty removing stem after session
- Solution 1: Wait 1-2 minutes for the device to cool slightly
- Solution 2: Gently twist while pulling rather than pulling straight out
- Solution 3: Check the rubber gasket for debris or damage
- Solution 4: Apply a very small amount of food-grade lubricant to the O-ring
- Solution 5: Use the straight stem, which sometimes releases more easily than the curved
Problem: Uneven heating or hotspots
- Solution 1: Ensure the stem is fully inserted
- Solution 2: Try a different stem to isolate the issue
- Solution 3: Check for air leaks around the stem connection
- Solution 4: Inspect the heating chamber for debris
- Solution 5: Contact Arizer support if problem persists—could indicate heater issue
Diverse User Testimonials
The true testament to any device is the diversity of users it satisfies. Here are genuine experiences from people I've personally introduced to the Solo 3:
"The Perfect Medical Companion"
Elizabeth, 58, Arthritis Patient
After trying numerous vaporizers, I finally found one that meets my needs completely. The Solo 3's glass stems are easy to handle even with my arthritic fingers, and I can pre-load several for my day without requiring complex dexterity. The long battery life means I'm not constantly worried about charging, which is perfect since I use it throughout the day for pain management. Most importantly, the pure glass vapor path means I'm only inhaling the compounds I want, without any plastic or silicone taste contaminating my medicine. The reliability and consistent performance give me peace of mind—this device just works, every single time.
"From Skeptic to Believer"
Michael, 34, Former Smoker
I was highly skeptical about vaporizers after trying several that left me unsatisfied with wispy vapor and weak effects. The Solo 3 completely changed my perspective. The vapor production is substantial without being harsh, and the glass pathway preserves flavors I never detected before. The temperature control lets me target exactly the experience I want—whether I'm looking for flavor on a weekend morning or stronger effects after work. I've cut my material consumption by almost 40% while getting better results, and after six months, my persistent smoker's cough is completely gone. The battery life is almost ridiculous—I've taken it on weekend trips without even bringing the charger.
"Worth Every Penny for the Flavor Purist"
Aisha, 29, Culinary Professional
As someone who works with flavor profiles professionally, I'm particularly sensitive to how different devices affect taste. The Solo 3's all-glass pathway is legitimately in a different class—it's like comparing properly served wine in crystal glassware versus drinking from plastic. The temperature precision allows me to target specific terpenes and create almost "curated" experiences. I particularly appreciate the ability to start at very low temperatures to experience the most volatile compounds before they're overshadowed by the heavier notes that emerge at higher temperatures. The device's consistency means I can reliably reproduce my favorite sessions, which is important when I'm using specific strains for creative work.
"Practical Perfection"
David, 45, Outdoor Enthusiast
I needed a vaporizer that could handle weekend camping trips without constant charging or fussy maintenance. The Solo 3 has been flawless in this role. The battery lasts for my entire weekend even with regular use, the durable construction has survived being dropped on rocks twice, and the pre-loaded stems with caps make it practical to use on hikes without carrying extra equipment. The straightforward interface means I never have to fiddle with complex settings while outdoors. While it's not the smallest device, the performance advantage over more compact vaporizers makes the slightly larger size worth it. I particularly appreciate that glass stems are inexpensive to replace if accidents happen during adventures.
Arizer Solo 3 vs. Mighty+: Premium Portable Comparison
As someone who owns and regularly uses both, here's my straightforward comparison of these premium options:
| Feature | Solo 3 | Mighty+ | Why It Matters |
|---|---|---|---|
| Vapor Path | All-glass | Plastic/metal | Solo 3 offers purer flavor |
| Heat-up Time | 20-25 seconds | 60 seconds | Solo 3 ready nearly 3× faster |
| Battery Life | 15-20 sessions | 6-8 sessions | Solo 3 offers over twice the usage time |
| Maintenance | Very low | Moderate | Solo 3 requires less frequent cleaning |
| Chamber Material | Ceramic | Aluminum | Solo 3's ceramic provides even heating |
| Ease of Loading | Moderate | Very easy | Mighty+ easier to load on-the-go |
| Size | 11.4 × 4.5 cm | 14.0 × 8.0 × 3.0 cm | Solo 3 more compact overall |
| Portability | Moderate | Moderate | Both require a pocket or bag |
| Price | £259 | £319 | Solo 3 offers similar quality at lower price |
Choose Solo 3 if: You prioritize flavor purity, battery life, and minimal maintenance at a lower price point.
Choose Mighty+ if: You prefer easier loading, don't mind more maintenance, and want the most foolproof operation regardless of price.
Comparing the Solo 3 to 2025's Top Competitors
As someone who has personally tested all these devices extensively, here's how they truly compare:
| Feature | Solo 3 | Venty | Tinymight 2 | PAX Plus | XMAX Starry 4 |
|---|---|---|---|---|---|
| Heating Type | Hybrid (primarily convection) | Advanced Hybrid | Hybrid (on-demand) | Conduction | Conduction |
| Heat-up Time | 20-25 seconds | 20 seconds | 5-10 seconds | 20-25 seconds | 25-30 seconds |
| Battery Life | 15-20 sessions | 10-14 sessions | 5-7 sessions | 8-10 sessions | 6-8 sessions |
| Vapor Path | Glass | Plastic/Steel | Glass | Metal | Zirconia |
| Chamber Material | Ceramic | Ceramic-coated | Stainless steel | Stainless steel | Ceramic |
| Vapor Quality | ★★★★★ | ★★★★★ | ★★★★★ | ★★★★☆ | ★★★☆☆ |
| Ease of Use | ★★★★★ | ★★★★☆ | ★★★☆☆ | ★★★★☆ | ★★★★☆ |
| Maintenance | ★★★★★ | ★★★☆☆ | ★★★☆☆ | ★★★☆☆ | ★★★☆☆ |
| Durability | ★★★★★ | ★★★★★ | ★★★☆☆ | ★★★★☆ | ★★★☆☆ |
| Price (2025) | £259 | £449 | £299 | £219 | £89.99 |
Key Comparison Insights
Solo 3 vs. Venty: The Venty offers superior airflow control and slightly faster heat-up, but at nearly twice the price. The Solo 3 provides better battery life, easier maintenance, and pure glass vapor path. Choose Venty if adjustable airflow is critical and price is no object; choose Solo 3 for better value, battery life, and flavor purity.
Solo 3 vs. Tinymight 2: The Tinymight 2 offers on-demand heating and a handcrafted wooden design. The Solo 3 provides significantly better battery life, easier operation, and more consistent performance. Choose Tinymight 2 if on-demand heating is essential; choose Solo 3 for reliability, battery life, and ease of use.
Solo 3 vs. PAX Plus: The PAX Plus offers superior pocket-friendliness in a more discreet package. The Solo 3 delivers substantially better vapor quality, battery life, and easier maintenance. Choose PAX Plus if ultimate portability is your priority; choose Solo 3 for vapor quality and battery life.
Solo 3 vs. XMAX Starry 4: The Starry 4 is the budget option at a third of the price. While it can't match the Solo 3's performance, it offers good value for budget-conscious users. Choose Starry 4 if price is your primary concern; choose Solo 3 for superior performance in every category.
Extended FAQ: Common Questions Answered
Performance Questions
Q: Is the all-glass vapor path really that significant for flavor?
A: Based on blind testing with multiple users, the difference is substantial and immediately noticeable. The glass pathway preserves delicate terpenes that are altered or diminished when vapor passes through silicone, plastic, or metal components. This is particularly evident with high-quality botanical materials that have complex terpene profiles. Medical users often report being able to more accurately identify the specific effects of different strains due to this flavor accuracy.
Q: How does the Solo 3 perform with different types of botanical materials?
A: The convection-primary heating system adapts well to various material types:
- Dense, sticky materials benefit from a slightly coarser grind and lower temperatures initially
- Drier materials work well with standard grind and slightly higher starting temperatures
- Very high-potency materials work exceptionally well in small amounts using the microdosing technique
- All material types benefit from the even extraction, which prevents wasting active compounds
The temperature precision and even heating ensure consistent results regardless of material variation—a significant advantage over less sophisticated heating systems.
Q: Is the Solo 3 efficient with material consumption?
A: The Solo 3 is among the most efficient portable vaporizers I've tested. The convection-primary heating extracts compounds more evenly than pure conduction vaporizers, while the isolated glass pathway ensures no vapor is lost to condensation on internal components. In my comparative testing, users typically consumed 20-30% less material to achieve the same effects compared to conduction vaporizers. This efficiency becomes significant over time, effectively offsetting the initial device cost through reduced consumption.
Practical Usage Questions
Q: How does the stem loading system compare to direct-load vaporizers?
A: While initially less intuitive than direct-load systems, the stem loading approach offers several practical advantages:
- Keeps the heating chamber extremely clean, reducing maintenance
- Allows pre-loading multiple stems for extended outings
- Creates natural cooling as vapor travels the length of the glass
- Prevents accidental spillage inside the device
- Enables quick "bowl" changes by simply swapping stems
After the initial learning curve, most users come to prefer this system, particularly appreciating the reduced maintenance requirements and the ability to pre-load for convenience.
Q: Is the Solo 3 suitable for on-the-go use despite the glass stems?
A: With appropriate accessories and techniques, the Solo 3 can be effectively used on-the-go:
The included stem caps allow for safely carrying pre-loaded stems, which can be quickly swapped during mobile sessions. The carrying case provides additional protection for both the device and glass components when traveling. While the glass stems do require more careful handling than all-metal alternatives, their benefits for vapor quality make this trade-off worthwhile for many users.
For users concerned about stem durability, replacement stems are affordably priced and readily available. Many experienced users keep multiple stems in rotation, which both extends their longevity and provides convenience for on-the-go use with pre-loaded options.
Q: How does the Solo 3 handle concentrates?
A: While primarily designed for dry herbs, the Solo 3 can accommodate concentrates effectively:
Use the included concentrate pad placed in the stem Set temperature to the higher range (200°C-220°C) Take slower draws to allow proper vaporization Clean stems more thoroughly after concentrate use
The Solo 3 performs admirably with concentrates, though dedicated concentrate devices may offer more specialized functionality. For users who occasionally enjoy concentrates alongside their primary dry herb use, the Solo 3 provides a versatile all-in-one solution without requiring separate devices.
Q: How reliable is the Solo 3 for daily use?
A: The Solo 3 is engineered specifically for consistent long-term performance:
The simplified design has minimal moving parts that could fail Arizer's reputation for durability extends across their entire product line The ceramic heating element is covered by a lifetime warranty The separation of electronics from the vapor path prevents contamination Regular but minimal maintenance ensures years of consistent performance
In extensive durability testing, the Solo 3 has proven exceptionally reliable even under heavy daily use. Many users of previous Arizer products report multiple years of flawless operation, suggesting the Solo 3 will continue this tradition of dependability.
Technical Support and Warranty Information
Arizer stands behind the Solo 3 with comprehensive support options:
2-year warranty on the device and electronics Lifetime warranty on the heating element Responsive email support typically within 24-48 hours Active user community for troubleshooting and tips Readily available replacement parts and accessories
To initiate a warranty claim or request support:
- Contact Arizer's customer service through their official website
- Provide your purchase information and device serial number
- Describe the issue in detail, including any troubleshooting steps attempted
- Follow their shipping instructions if your device requires service
For most users, Arizer's support team provides quick resolution to any issues. The modular design means many components can be replaced individually rather than requiring a complete device replacement, minimizing downtime and environmental impact.
Conclusion: Why the Solo 3 Defines Portable Vaporizer Excellence
After hundreds of hours testing the Solo 3 alongside its competitors, what stands out most is how thoroughly it addresses the few limitations of its predecessors while preserving their legendary vapor quality and reliability.
For newcomers to vaporizing, the Solo 3 provides an accessible entry point with straightforward operation and minimal maintenance requirements. For experienced users, it offers the precision and performance that elevate the experience beyond what most portable devices can deliver.
The extraordinary battery life transforms how you interact with the device, eliminating the constant charging anxiety common with portable vaporizers. The dramatically improved heat-up time makes it suitable for quick sessions that were impractical with earlier models, while the all-glass vapor path continues to set the standard for flavor preservation.
Whether you're seeking your first premium vaporizer or upgrading from an earlier model, the Solo 3 represents exceptional value through its combination of performance, reliability, and thoughtful design. It stands not just as an evolution of Arizer's acclaimed Solo line, but as a new benchmark for what portable vaporizers can achieve.
For those who prioritize vapor quality, battery life, and long-term reliability, the Solo 3 delivers an experience that rivals desktop units while maintaining genuine portability—truly the best of both worlds in modern vaporization technology.


Leave a comment
This site is protected by hCaptcha and the hCaptcha Privacy Policy and Terms of Service apply.