Vaporizer 101 · Getting Started
Your Vape Isn't Broken. Your Herb Is. (Grind, Moisture, and the Jar Under My Desk)
"The 15 minutes of prep that matter more than your £300 device."

Most "my vape isn't working" complaints aren't about the vape. They're about the herb you're feeding it. Three pre-session variables — grind consistency, moisture content (55–62% RH), and storage — quietly determine whether the device, the temperature, and the technique even matter. Get them right and an £85 budget vape outperforms a £300 flagship loaded with badly-prepped flower. Get them wrong and no firmware update will save you.
Twenty quid of kit (grinder, sealed glass jar, pack of Boveda 62) is the most cost-effective upgrade in the entire vaporizer ecosystem.
The Months I Blamed My Device
For the first two months of owning a proper vaporizer, I was convinced I'd bought the wrong one.
I'd done everything the guides told me. I'd read the temperature article — well, I'd read the American blog version of it, which confidently told me to run everything at 215°C. I'd bought a grinder. I'd waited for the full heat-up. I was drawing slowly. I wasn't overpacking. I was, by my own reckoning of a forty-two-year-old with ADHD who'd spent nearly two decades rolling spliffs before switching at thirty-four, doing the whole thing correctly.
And the sessions were… fine. Not amazing. Not what the forums promised. The vapour was thin. The flavour was flat. Half the time I'd finish a bowl and think, "is that it?" and then reach for a spliff twenty minutes later because I wasn't quite there yet. Which, given I'd just had the GP conversation that made me quit tobacco in the first place, was exactly the behaviour I was trying not to do.
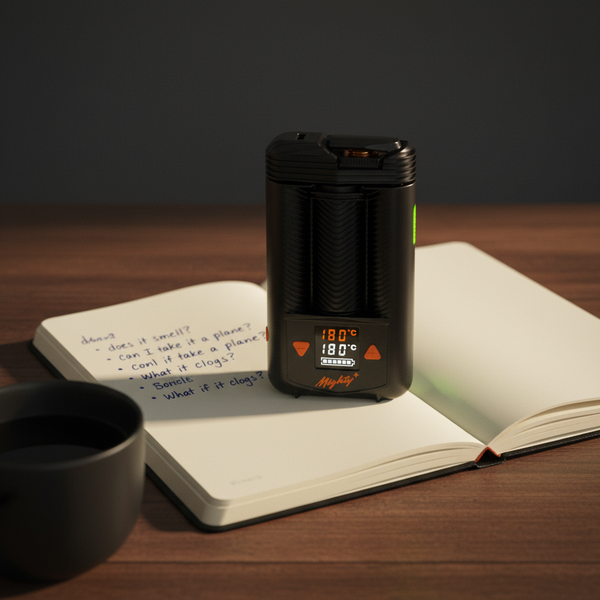
I blamed the Mighty. I blamed the temperature. I blamed my technique. I blamed the heating element. I nearly returned it.
Then one Saturday afternoon, I couldn't find my usual stash jar. I'd been keeping the current week's herb in a sandwich bag on my desk — cracked open, reclosed badly, half the contents probably evaporating into my IT-professional loft conversion. In a mild panic I dug into the back of a cupboard and found an old Kilner jar Dave had given me months before with about three grams inside. Sealed, dark, room temperature, untouched for eight weeks. I packed the Mighty with it. The session was a different thing entirely.
Thick vapour. Flavour I didn't know cannabis had. A clean, even effect that lasted properly. It wasn't the device. It wasn't the temperature. It was the jar.
Your vape is only as good as what you put into it.
The Vaporizer 101 series has articles on temperature, heating methods, session types, troubleshooting, cleaning, and accessories. What it doesn't have — what almost no beginner guide online has — is a piece on the stuff that happens before the herb touches the chamber. The 15 minutes of prep that quietly determine whether the next six articles in the series even work. This is that piece.
The Three Variables That Actually Matter
Vaporisation is a precise thermal process. You're trying to heat plant material to 175–210°C, just below combustion, for long enough to liberate cannabinoids and terpenes from resin glands without setting anything on fire. Every variable that affects that process happens in the chamber.
Three of those variables are set before you even pick up the device:
- Grind. How uniformly the herb is broken down.
- Moisture. How much water is in the plant material.
- Storage. What state the herb is in by the time you load it.
Get these right and an £85 Smono will outperform a £300 Mighty loaded with badly-prepped herb. Get them wrong and no amount of temperature stepping, draw technique, or expensive firmware will save you. Jake learned this the hard way with his £299.99 TinyMight 2 — the thing is objectively a better device than the £79.99 V3 Pro now doing his daily driving, but it lives in a drawer because he kept feeding it supermarket-dry sandwich-bag weed and blaming the device. Exactly the mistake I made for two months.
The Grind: Consistency Beats Fineness
The single most common mistake I see is people grinding too fine. The second most common is grinding too coarse. The third is grinding unevenly, which is really both of the first two happening in the same bowl.
Here's what's actually going on. Vaporizers extract by heating air, and that heated air has to pass through the plant material to strip off the active compounds.
If the material is too fine — ground to a powder, the kind you get when you absentmindedly keep twisting a grinder for a minute (guilty, ADHD, every time) — you create two problems:
- Airflow resistance: the chamber packs too tightly and pulling feels like inhaling through a blocked straw.
- Screen blockage: fine particles fall through the screen into the airpath, where they sit quietly cooking at 200°C and tasting like burnt popcorn two sessions later.
If the material is too coarse — thumb-ripped off a bud, a grinder you gave up on after three twists — you get the opposite problem: the hot air blows around the large chunks rather than through them, extraction is uneven, the edges char while the centres stay green, and you end up with a half-extracted bowl that looks done but isn't.
The sweet spot is what most coffee people would recognise as a "medium grind": roughly the texture of coarse sea salt or couscous. You should be able to see individual pieces. No dust. No stalks. No powder.
Device-Specific Grind Cheat Sheet
| Device Type | Ideal Grind | Why |
|---|---|---|
| Convection on-demand (TinyMight, DynaVap) | Medium, consistent | Hot air needs to pass through, not around, the material |
| Hybrid session (Mighty+, Crafty+ V2, Venty) | Medium to medium-fine | Hot air plus conducted heat tolerates a slightly denser pack |
| Pure conduction (PAX, Flowermate, older portables) | Medium-fine | The chamber walls are the heat source — surface contact matters |
| Desktop / bag-fill (Volcano) | Medium, slightly fluffed | You're filling a balloon, not drawing; more airflow matters |
| Glass stem devices (Arizer Solo 3 v2) | Medium, packed gently | Stems have generous airflow; a dense pack suffocates |
The deeper truth is: consistency matters more than the exact fineness. Ten pieces all the same size will out-extract five dust-clumps and five pebbles every time. (Tom figured this out about six months into his Crafty+ V2 — once he stopped grinding different-sized bowls each session, his morning cough was gone and so was the "why is this inconsistent" WhatsApp he used to send me every Sunday.)
What to Use
A two-piece metal grinder with sharp teeth will do 90% of what you need. £15–£25. Anything more is enthusiast territory. Avoid the wooden acrylic ones from the corner shop — they blunt in a month and produce inconsistent cuts. Avoid scissors and a shot glass unless you are genuinely on holiday without options; the cut is wildly uneven and you'll lose kief to the glass sides.
If you want to go proper: a four-piece with a kief catcher and a pollen screen is worth the extra tenner. The kief you collect over three months is a genuinely nice little stash of its own. (Dave, who has opinions about grinders the way some men have opinions about lawn mowers, will go on at length about four-piece ownership given half a prompt.)
The one grinder accessory absolutely worth owning: a small brush to clean resin buildup out of the teeth. £2 on Amazon. Changes nothing about the session itself but extends the grinder's useful life from a year to five.
The Moisture Question: 55–62% RH
This is the gap in the internet's cannabis knowledge that causes more disappointing vape sessions than any other single factor. Almost nobody talks about it. Nearly everybody gets it wrong.
Dry cannabis is a problem for vaporizers in a way it isn't for joints.
When you combust herb, temperature doesn't really matter — you're hitting 900°C either way, and water content just affects how smoothly it burns. When you vaporise, you're operating in a 35-degree window where the water content of the plant material directly changes how heat transfers through it, how the trichomes rupture, and how the vapour tastes.
| Moisture State | What Happens In the Chamber |
|---|---|
| Too dry (most supermarket-style UK herb) | Plant material behaves like straw. Heats too fast, combusts at the edges even at low temperatures. Vapour is harsh and the flavour vanishes because the terpenes have already left in the drying process. |
| Too wet (uncured homegrow or over-Boveda'd) | Water in the material evaporates off before the cannabinoids do. Thick first-draw cloud that tastes of nothing, wet chamber, underwhelming effect because you've spent your heating budget boiling water. |
| 55–62% RH (target) | Trichomes rupture cleanly, terpenes preserved, even extraction across the bowl. What the cannabis industry calls "ideal." |
You can't feel it — the difference between 50% RH and 60% RH on a bud is undetectable to the human hand. You can taste it, eventually, once you know what to taste for. But the easier answer is to control it.
Two-Way Humidity Packs
Boveda is the best-known brand; Integra Boost is functionally identical and usually cheaper. They come in 62% and 58% variants. A single pack in a sealed jar will hold 3–14 grams at the correct humidity for 2–4 months, depending on how often you open the jar and how dry the ambient air is.
"Two-way" is the key phrase: the pack adds moisture when the herb is dry and absorbs moisture when the herb is wet. You can't over-hydrate with them. You can only forget to replace them when they go hard.
Sarah, who has never knowingly vaporised anything, will nevertheless ask me once a month if "the little squishy thing in the jar is still squishy." It's one of the more charming bits of collateral-relationship knowledge in our flat.
Cost: about £5 for a pack of four. Genuinely the best-value vaporizer accessory in existence. (See the Accessories Guide — this is the one I'll double down on.)
What to Do With the Herb You Already Have
- Arrived very dry: put it in a small sealed jar with a 62% pack. Leave it 24–48 hours. Don't open it. Don't "check." Don't shake it. It'll come back.
- Arrived sticky-wet: put it in a jar without a pack, lid cracked open, for 12 hours. Then close the jar, add a 58% pack, and leave another 24 hours.
- You have no Boveda and it's the weekend: a small piece of fresh (not mouldy) orange peel in a sealed jar for 4–6 hours will rehydrate adequately. Remove the peel afterwards. Emergency-kit territory, not a long-term method.
Storage: Dark, Sealed, Boring
The fourth variable people get wrong is what happens to the herb between sessions. This is the most boring part of this article and the one that probably saves you the most money over a year.
Three Enemies of Stored Cannabis (Worst First)
| Enemy | What It Does | Fix |
|---|---|---|
| Light | UV breaks down THC into CBN within weeks of constant exposure. That's why dispensaries use opaque containers. The clear jar by the window is degrading faster than it needs to. | Opaque jar, drawer, biscuit tin, or Tupperware |
| Air | Every time the jar opens, terpenes (the volatiles responsible for flavour and effect profile) lose concentration. Bottom third of a three-month-old jar is never as good as the top third was. | Open the jar once per session, not multiple times |
| Temperature variation | Cupboards above radiators, shelves in afternoon sun, top of a fridge where the compressor cycles — all bad. | Stable 16–22°C; kitchen cupboard away from the kettle |
The Storage Setup That Works
- Small glass jar with a proper rubber-sealed lid. Kilner 125ml is perfect for a week's herb. £2.50 at any supermarket. Don't pay £20 for a "cannabis jar" on Amazon with a branded logo — it's literally the same jar.
- One humidity pack per jar.
- Opaque storage, or at minimum a cupboard that stays closed. If your jar is clear, keep it in a drawer.
- One jar per strain, if you keep multiple. Mixing strains means you can't meaningfully match temperature to strain (see The Temperature Guide), and the different terpene profiles bleed into each other over a couple of weeks.
What Doesn't Work
Sandwich bags. Zip-lock bags. The little grip-seals dealers used to use. These are for transport, not storage. Plastic is porous at the molecular level; the terpenes will migrate out of the plastic within days. The original packaging most brands send cannabis in is fine for a week, poor for a month.
And don't store a week's herb pre-ground inside the grinder. Ground herb has 40× the surface area exposed to air, oxidises in a couple of days, and loses most of its terpenes inside a week. Grind when you need it. Not before. This single habit will improve your sessions more than changing device ever will.
A Mate's Perspective
Marcus came up from London last month to record with a client in Salford. Marcus and I go back — met at the same company in London years ago, bonded over being the two people who'd step outside for suspiciously long breaks and the fact that we were both United fans in a city that didn't rate either of us for it. He does music now — production, sound engineering, studio sessions — and came to dry herb the long way round. Got his medical prescription about six months back after fifteen-plus years of doing it the old way.
He watched me grind for a session one evening and stopped me halfway through.
"How much are you putting in?" "0.15, 0.2 maybe." "And you're grinding all of that?" "Yeah." "Mate." He held out his palm. "Give me the bud." He pinched off exactly what he needed, put the rest back in the jar, and ground only the portion that was going into the chamber. "If it wastes my herb, it wastes my money," he said. "My prescription's £150 a month. I'm not grinding a week's worth on a Tuesday and watching it go flat by Friday."
I've been doing this for eight years and I hadn't thought about it in those terms. For Marcus, whose pharmacy is the NHS-adjacent wholesale price and whose studio sessions pay the bills, waste is the enemy. Every gram that goes stale in the jar is money that vanished. Every gram that combusted because he didn't grind properly is money that burnt.
The stuff costs money, takes effort to get, and you only get one chance to put it through your device well. Don't waste that chance.
15 Minutes of Prep, £20 of Kit
If you've already spent serious money on the device, here's the absolute minimum to get your herb right. Use code DENNIS5 at checkout for 5% off.
Two-Piece Metal Grinder
~£12 · CNC aluminium
Sharp teeth, consistent medium grind, no microplastic shedding. Avoid wood/acrylic from the corner shop — they blunt in a month. A four-piece with kief catcher is £25 and worth the extra tenner if you can stretch.
Sealed Glass Jar (Kilner 125ml)
~£3 at any supermarket
Rubber-sealed lid, opaque or kept in a drawer. Holds a week's herb at the right humidity if paired with a Boveda. Don't pay £20 for a "cannabis jar" on Amazon — it's literally the same jar.
Boveda 62% Humidity Packs (4-Pack)
~£5
Two-way packs that add moisture when herb is dry, absorb when it's wet. Can't over-hydrate. Lab data shows 23% more cannabinoids and 18% more terpenoids retained vs uncontrolled storage.
Hygrometer + Spare Jars
+£8 hygrometer / +£3 per jar
Actually measure jar humidity. One jar per strain so terpene profiles don't bleed into each other. Gets you into the £60 range for a full enthusiast prep setup.
Use code DENNIS5 at checkout on herbvape.co.uk for 5% off any order.